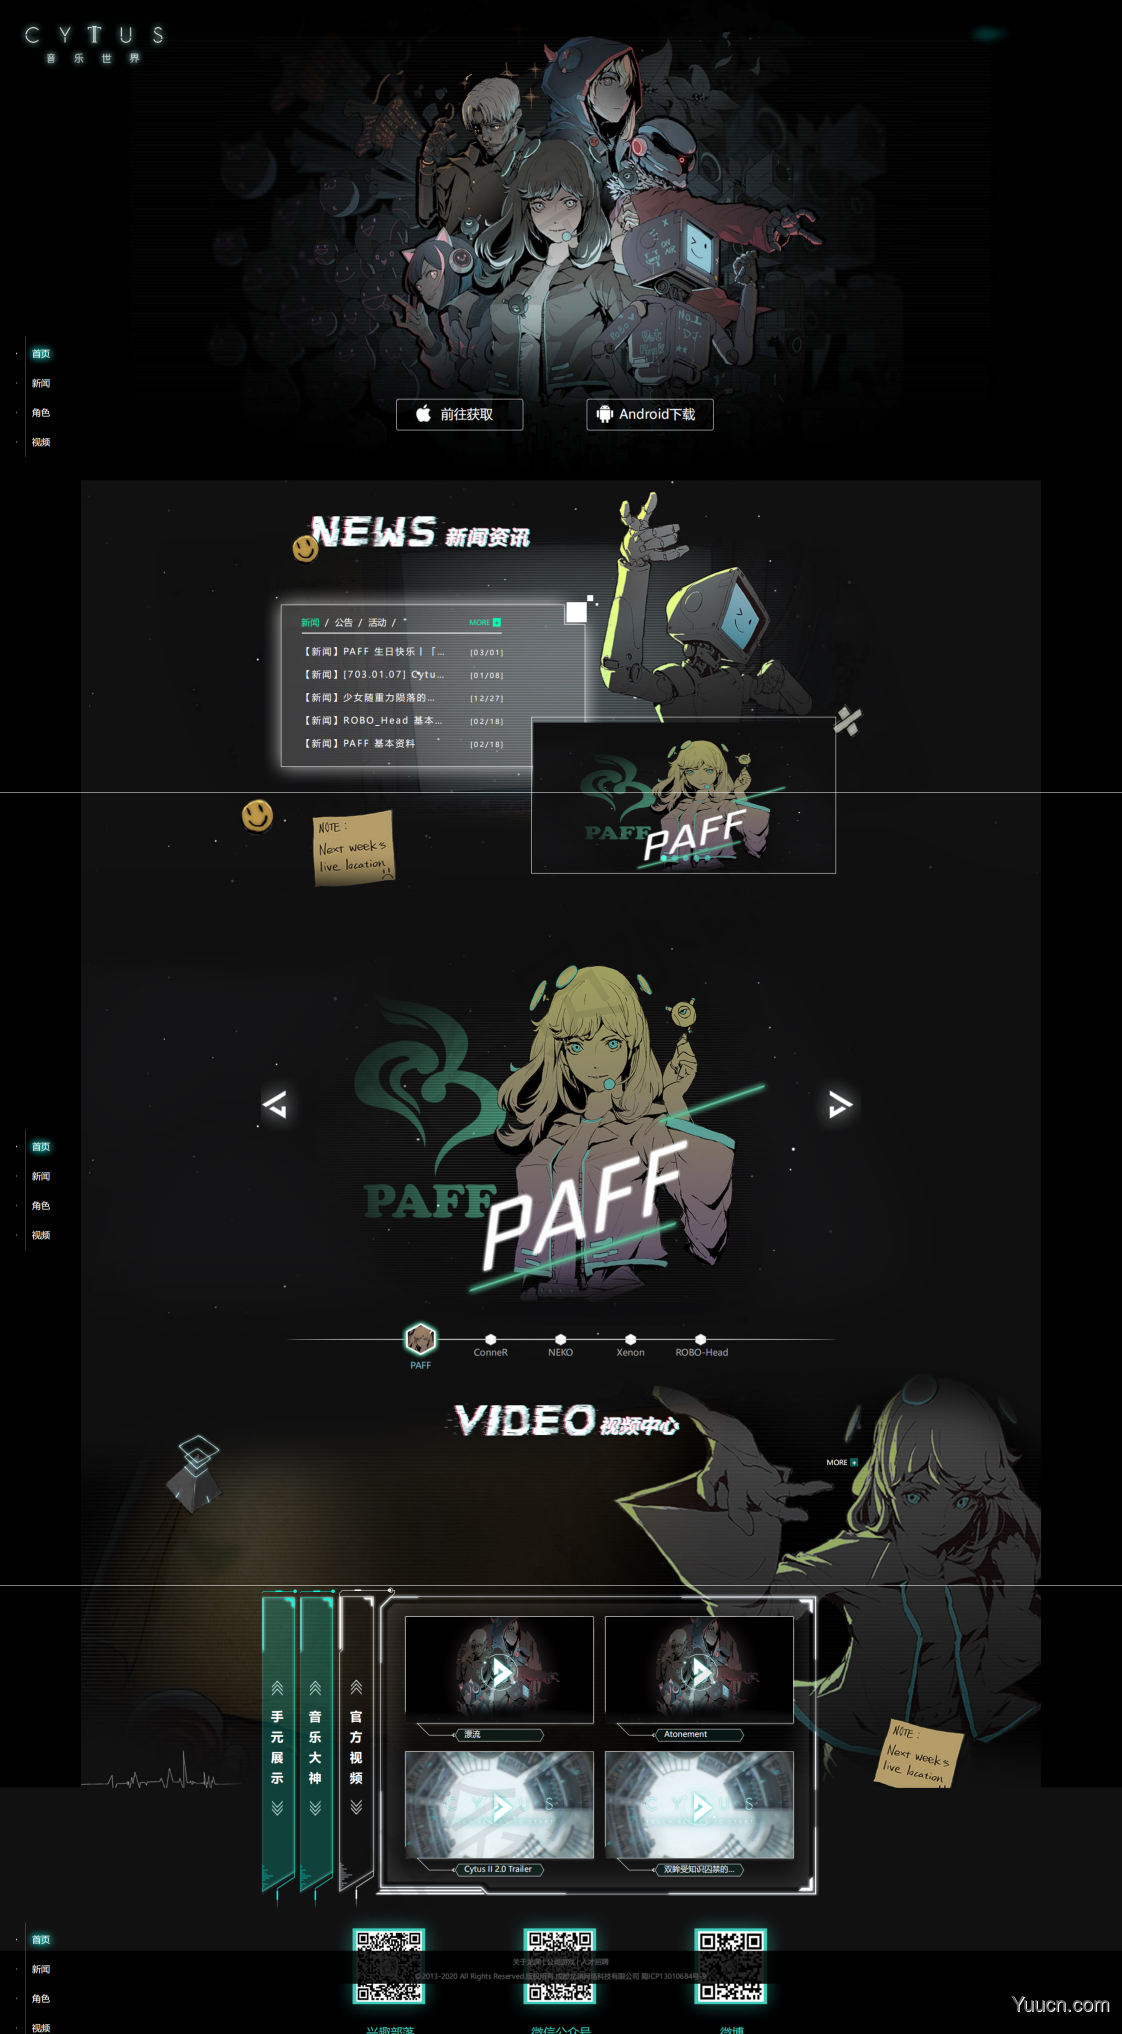
网页Cytus Ⅱ的制作
整体布局

单栏布局,整体按顺序分为以下几个板块:
页首下载、新闻表单、角色轮播图、视频、页尾以及侧边栏
要尽可能把自己的所有知识用上,所以可能会有和原网页写法不同,但基本样式差不多
页首下载
背景图片
.head {
	width: 100%;
	height: 960px;
	background: url(../image/headimg.jpg) no-repeat;
	background-position: center top;
}
左上角的logo
在html中直接使用img标签
.head .logo {
	margin-left: 1%;
	margin-top: 1%;
}
下载盒子
这里直接使用了flex布局中的justify-content属性,用于两个链接的居中
.head .download {
	display: flex;
	margin-top: 640px;
	justify-content: center;
	width: 100%;
	height: 88px;
}
双设备下载链接
苹果和安卓缩略图使用icomoon的字体图标,设定圆角实线白边框,然后稍微调整一下链接位置
.head .download .iphone {
	width: 254px;
	height: 63px;
	margin-right: 152px;
	font-size: 26px;
	color: #FFFFFF;
	border: 1px #FFFFFF solid;
	border-radius: 5px;
	text-align: center;
	line-height: 63px;
}
.head .download .android {
	width: 254px;
	height: 63px;
	left: 50%;
	font-size: 26px;
	color: #FFFFFF;
	border: 1px #FFFFFF solid;
	border-radius: 5px;
	text-align: center;
	line-height: 63px;
}
页首下载板块完成
新闻表
新闻框
新闻框的制作似乎要用到JS Dom节点操作属性,之后学习了js后进行优化,现在是静态实现
精灵图的使用
精灵图的使用可以减少网页所加载的图片数量,优化了访问速度,精灵图的使用也就是background-position的使用,一般会将精灵图在css中单独写个类选择器,在html标签要使用的时候加上选择器名称并设置其background-position属性即可。
轮播图展示
参考实现,依旧是js的代码,虽然暂时写了出来,但是不能够完全理解。
以下是参考的例子
<!DOCTYPE html>
<html>
<head>
<meta charset="utf-8">
<title>轮播图效果</title>
<style type="text/css">
body {
padding: 0;
margin: 0;
}
.box {
width: 1920px;
height: 1080px;
position: relative;
margin-left: 60px;
}
.box-img {
position: absolute;
top: 0px;
left: 0px;
overflow: hidden;
opacity: 0;
transition: all 1.5s;
}
.box-img:nth-child(1) {
opacity: 1;
}
.box .box-img img {
width: 100%;
height: 100%;
}
.box-left {
position: absolute;
width: 35px;
height: 70px;
background-color: #00000000;
color: #000000;
z-index: 100;
top: 505px;
border-radius: 0 5px 5px 0;
text-align: center;
line-height: 4.375rem;
font-size: 27px;
left: 0;
}
.box-left:hover {
background-color: #00000050;
color: #FFFFFF;
}
.box-right {
position: absolute;
width: 35px;
height: 70px;
background-color: #00000000;
color: #000000;
z-index: 100;
top: 505px;
border-radius: 5px 0 0 5px;
text-align: center;
line-height: 4.375rem;
font-size: 27px;
right: 0;
}
.box-right:hover {
background-color: #00000050;
color: #FFFFFF;
}
.box .box-set {
position: absolute;
bottom: 40px;
right: 900px;
}
.box .box-set ul {
padding: 0;
margin: 0;
list-style: none;
}
.box .box-set li {
float: left;
width: 16px;
height: 16px;
border-radius: 100%;
background-color: #CCCCCC;
margin-right: 10px;
}
.box .box-set li:nth-child(1) {
background-color: #FFFFFF;
}
.box .box-set li:hover {
background-color: #ffffff;
}
</style>
</head>
<body>
<div class="box">
<div class="box-img"><img src="" alt=""></div>
<div class="box-img"><img src="" alt=""></div>
<div class="box-img"><img src="" alt=""></div>
<div class="box-img"><img src="" alt=""></div>
<div class="box-img"><img src="" alt=""></div>
<div class="box-img"><img src="" alt=""></div>
<div class="box-left"><</div>
<div class="box-right">></div>
<div class="box-set">
<ul>
<li class="button"></li>
<li class="button"></li>
<li class="button"></li>
<li class="button"></li>
<li class="button"></li>
<li class="button"></li>
</ul>
</div>
</div>
<script type="text/javascript" src="https://www.cnblogs.com/Pilo-pillow/p/jquery-3.6.0.min.js"></script>
<script type="text/javascript">
$(function() {
var index = 0;//index表示当前图片的序号
var count;//count表示图片开始自动进行轮播
startInterval();
buttonchange();
function startInterval() {
count = setInterval(function() {
index++;
if (index == $(".box-img").length) index = 0;
$(".box-img").css("opacity", "0");
$(".box-img").eq(index).css("opacity", "1");
buttonchange();
}, 4000)
}
function buttonchange() {
$(".button").css("background-color", "#CCC");
$(".button").eq(index).css("background-color", "#FFF");
}
$(".box-left").click(function() {
clearInterval(count);
index--;
if (index == 0) index == $(".box-img").length;
$(".box-img").css("opacity", "0");
$(".box-img").eq(index).css("opacity", "1");
buttonchange();
startInterval();
})
$(".box-right").click(function() {
clearInterval(count);
index++;
if (index == $(".box-img").length) index = 0;
$(".box-img").css("opacity", "0");
$(".box-img").eq(index).css("opacity", "1");
buttonchange();
startInterval();
})
$(".button").click(function() {
clearInterval(count);
var bindex = $(this).index();
index = bindex;
$(".box-img").css("opacity", "0");
$(".box-img").eq(index).css("opacity", "1");
buttonchange();
startInterval();
})
})
</script>
</body>
</html>
与原官网相比增加了左右按钮
角色展示
角色展示同样是使用和上面相同的js轮播图,添加了在点击角色名字时文字颜色会改变
点击出现人物头像同时字体下移未实现
视频中心
视频中心的弹出框仅仅是写出了样式,并未完全实现
参考及使用的链接
音乐世界Cytus II-官方网站
饥人谷 JS Bin
五分钟掌握flex布局
精灵图的使用
Web网站轮播图教程(系统讲解)